
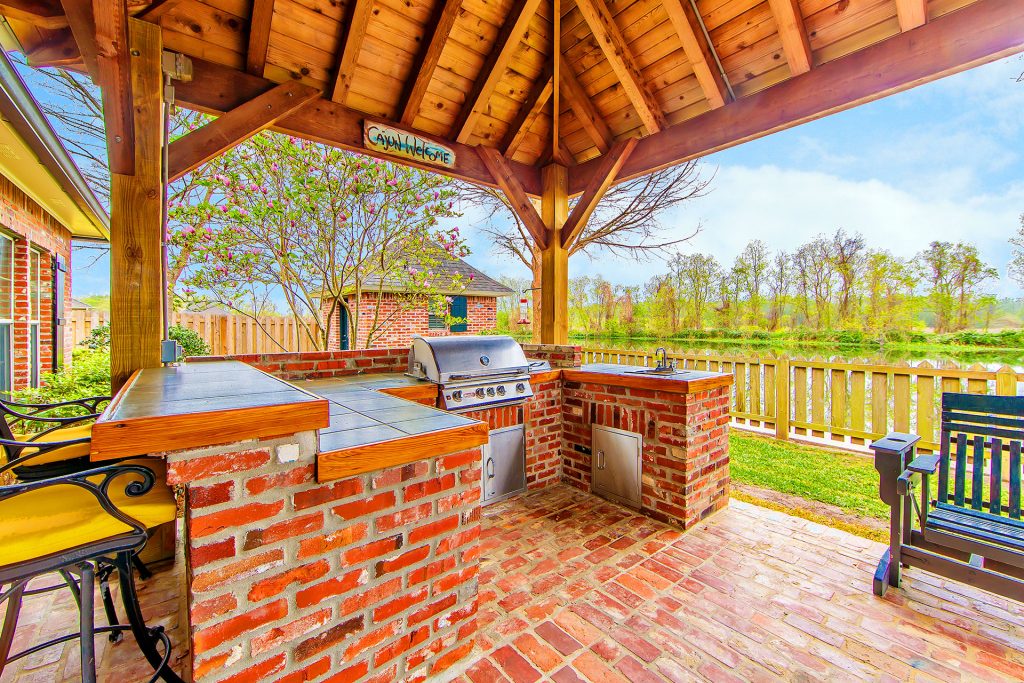
So you’re standing in your backyard, coffee in hand, imagining sizzling steaks, cold drinks, and friends gathered around a sleek outdoor counter instead of a wobbly folding table. That daydream is exactly why outdoor kitchen installation has become one of the most requested home upgrades. But between permits, plumbing, and picking the right grill, the process can feel overwhelming before you even lay the first brick.
What Does Outdoor Kitchen Installation Involve?
Outdoor kitchen installation involves designing a functional layout, running gas, water, and electrical lines, building a durable base (block, steel frame, or concrete), and installing appliances like grills, sinks, and refrigerators. Professionals also add weatherproof countertops and storage. The full process typically takes 2 to 6 weeks, depending on complexity and permitting requirements.
That short answer covers the basics, but there’s a lot more nuance once you start planning your own space. Let’s break down everything you actually need to know before swinging a hammer.
Why Homeowners Are Investing in Outdoor Kitchens
Outdoor living isn’t a passing trend anymore. It’s become a genuine extension of the home, almost like adding another living room, except this one has a grill and a beer fridge.
Here’s why so many homeowners are making the leap:
- Increased home value: A well-built outdoor kitchen can boost resale value significantly.
- More entertaining space: No more running back and forth to the indoor kitchen during parties.
- Better cooking experience: Grilling, smoking, and pizza ovens perform better with proper ventilation and setup.
- Lifestyle upgrade: It transforms your backyard into a functional, stylish hangout spot.
If you’re rethinking how your backyard functions altogether, it might help to first explore how your outdoor space can be optimized for the way you actually live, not just how it looks in photos.
Planning Your Layout Before Installation Begins
Before any concrete gets poured or gas lines get connected, layout planning is essential. A poorly planned outdoor kitchen can feel cramped, unsafe, or just inconvenient to cook in.
Common Outdoor Kitchen Layouts
- Straight-line layout: Best for smaller spaces or patios against a wall.
- L-shaped layout: Offers more counter space and separates cooking from prep zones.
- U-shaped layout: Ideal for larger backyards and frequent entertaining.
- Island layout: Great for open-concept backyards with multiple gathering areas.
Think about how people will move around the space. Will guests be sitting at a bar while you cook? Will kids be running around nearby? These small details shape the entire design.
Key Steps in the Outdoor Kitchen Installation Process
Every project is different, but most professional installations follow a similar roadmap.
1. Site Assessment and Design
A contractor evaluates your yard’s slope, drainage, and existing utilities. This step determines what’s realistically possible and helps avoid costly surprises later.
2. Permits and Utility Planning
Depending on your city, gas lines, electrical wiring, and plumbing may require permits. Skipping this step can lead to fines or forced tear-outs, so it’s not something to shortcut.
3. Foundation and Framing
This is where the kitchen’s “bones” come together. Most professionals use concrete block or steel stud framing since both hold up well against weather changes.
4. Utility Installation
Gas lines for grills, water lines for sinks, and electrical wiring for lighting or refrigeration get installed at this stage.
5. Countertops and Finishes
Materials like granite, concrete, or tile are added for durability and style. These surfaces need to withstand sun exposure, rain, and temperature swings.
6. Appliance Installation
Grills, smokers, refrigerators, and pizza ovens are installed and tested to ensure everything functions safely.
7. Final Walkthrough
A good contractor walks you through the space, tests appliances, and answers any lingering questions before calling the project complete.
Choosing the Right Materials
Not all materials perform the same outdoors. Choosing wisely now saves you money and headaches later.
CountertopsGranite, quartzite, and concrete resist heat and weather best.
CabinetryStainless steel or marine-grade polymer resist rust and moisture.
FlooringPavers, stamped concrete, or natural stone offer slip resistance.
How Much Does Outdoor Kitchen Installation Cost?
Costs vary widely based on size, materials, and appliance choices. Generally, homeowners can expect:
- Basic setups: Simple grill stations with modest counter space.
- Mid-range kitchens: Include sinks, storage, and upgraded countertops.
- Luxury installations: Feature pizza ovens, full refrigeration, bars, and premium finishes.
While price ranges shift depending on your region and contractor, investing in quality materials upfront often reduces repair costs down the road.
Common Mistakes to Avoid
Even excited homeowners can make planning mistakes that cause frustration later. Watch out for these pitfalls:
- Not accounting for wind direction, which affects smoke and heat placement.
- Skipping proper drainage, leading to water pooling near appliances.
- Choosing indoor-grade materials that can’t handle outdoor conditions.
- Underestimating counter space needed for food prep and serving.
Maintenance Tips to Extend Its Lifespan
Once your outdoor kitchen is complete, a little maintenance goes a long way.
- Cover appliances when not in use to prevent weather damage.
- Clean grease traps and grill components regularly.
- Reseal stone or concrete countertops annually.
- Inspect gas lines and connections each season for safety.
Final Thoughts
An outdoor kitchen isn’t just a backyard upgrade, it’s a lifestyle shift that turns ordinary evenings into something worth looking forward to. With the right planning, materials, and professional guidance, your outdoor kitchen installation can become the heart of your home’s entertaining space for years to come. Whether you’re grilling on a Tuesday night or hosting a full weekend cookout, a well-designed outdoor kitchen makes every gathering easier and more enjoyable.
Frequently Asked Questions
How long does outdoor kitchen installation typically take?
Most projects take between two to six weeks, depending on design complexity, permitting, and material availability.
Do I need a permit for an outdoor kitchen?
In most areas, yes, especially if gas lines, electrical wiring, or plumbing are involved. Always check local regulations before starting.
Can I install an outdoor kitchen on an existing patio?
Yes, as long as the patio’s foundation is stable and level. A contractor can assess whether reinforcement is needed.
What is the most durable material for outdoor countertops?
Granite and concrete are among the most weather-resistant options, offering both durability and style.
Is an outdoor kitchen worth the investment?
For many homeowners, yes. It increases usable living space, enhances entertaining options, and can boost property value.